Wednesday, November 30, 2011

A random nice write up on Sirui R-2004 tripod

After getting my hands on the R-2004 (tripod) and K20X (ballhead) I find that they are quite cool and so decided to do a simple and brief review on them.

Anyway, the official spec of the two products are as shown,

Sirui R-2004

Material: Aluminum
Number of sections: 4
Maximum Diameter (legs): 28mm
Minimum Diameter (legs): 19mm
Minimum Height: 360mm
Maximum Height: 1350mm
Maximum Height (wth center extended): 1610mm
Minimum Height (Storing height): 520mm
Weight (without ballhead): 1.7kg
Maximum Load (allowed): 15kg

Sirui K-20X

Maximum Diametre (Ball): 38mm
Maximum Height: 98mm
Weight: 0.4kg
Maximum load (allowed): 25kg

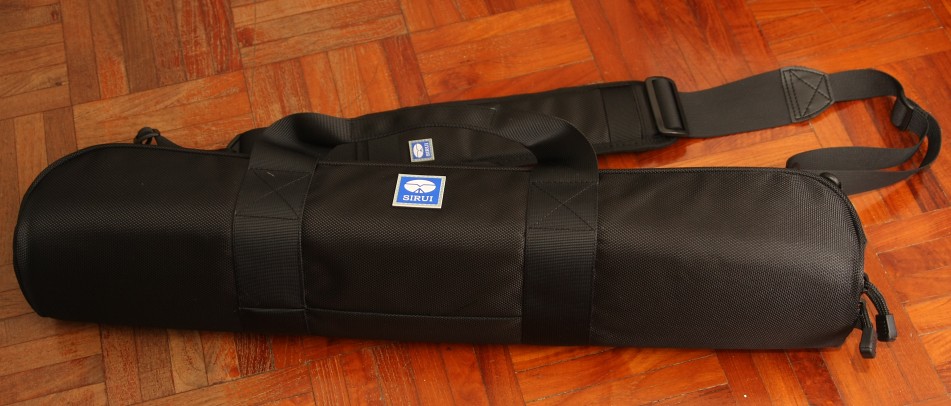
When I bought the tripod, it came with a cool tripod bag, that is big enough for the tripod and ballhead.


The tripod was solid when I first took out of the box. It was a pretty sight.

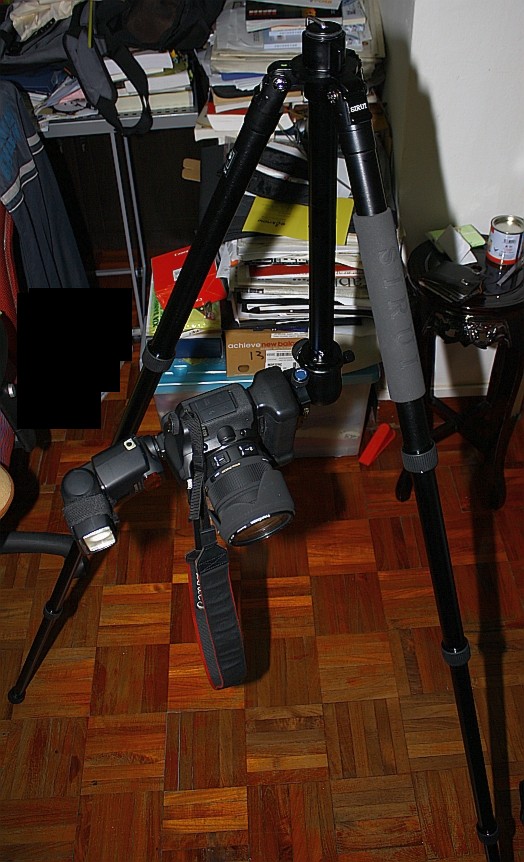
Tripod (bare)
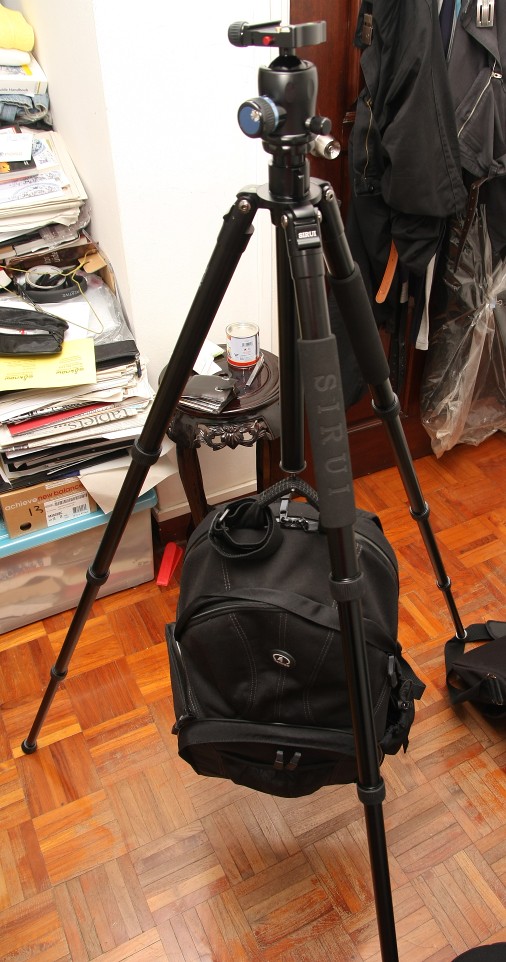
Tripod (with ballhead)
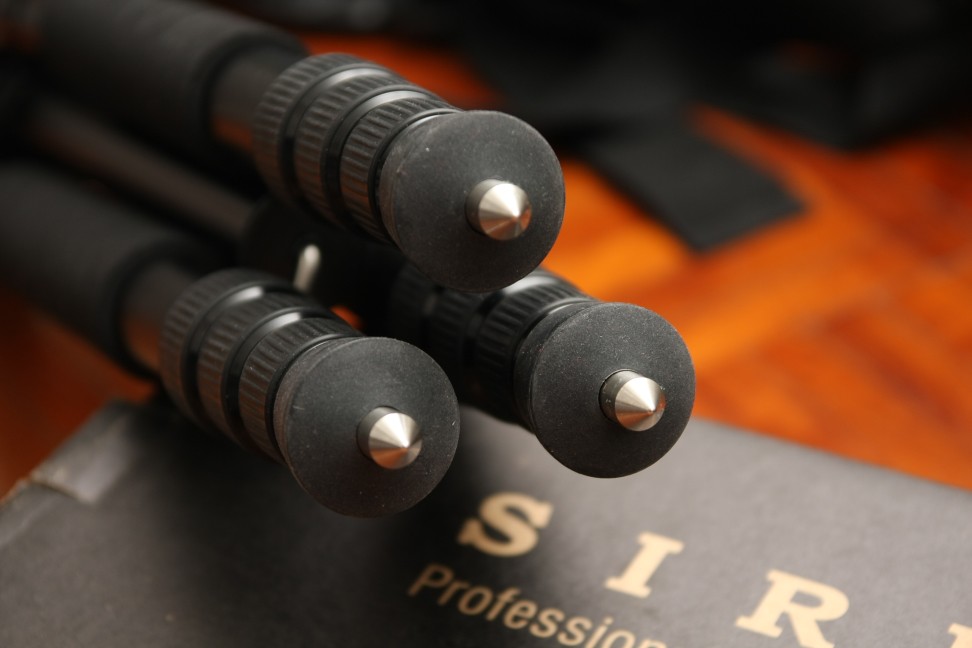
The tripod also came with retractable spikes at its feet.


I did a quick look at it in my room. (I know my room is a mess, so don't bother pointing it out).

The first thing I notice when deploying the tripod was that the screw locks are pretty tight and you need some force to unloosen the tightness of the screw locks so that the legs can extend... However I believe that is a must because I wouldn't want my tripod to collapse in the mist of a phototaking session because the screw lock loosen.

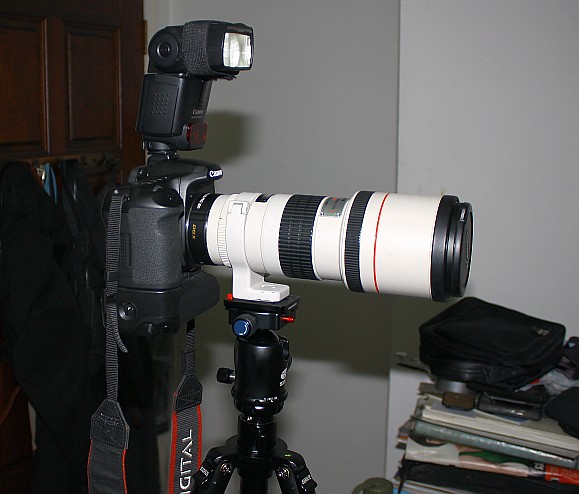
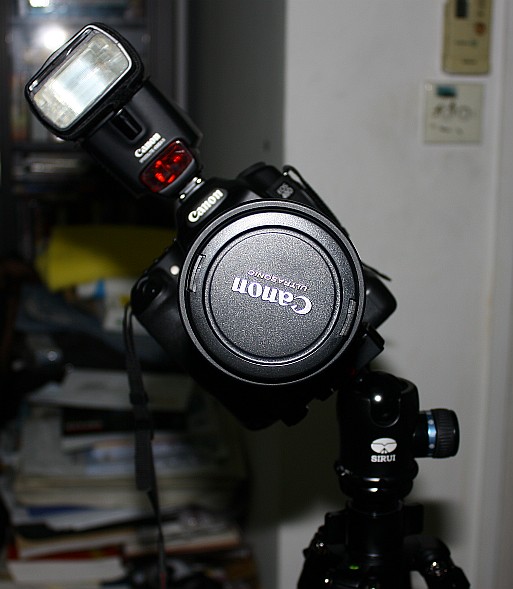
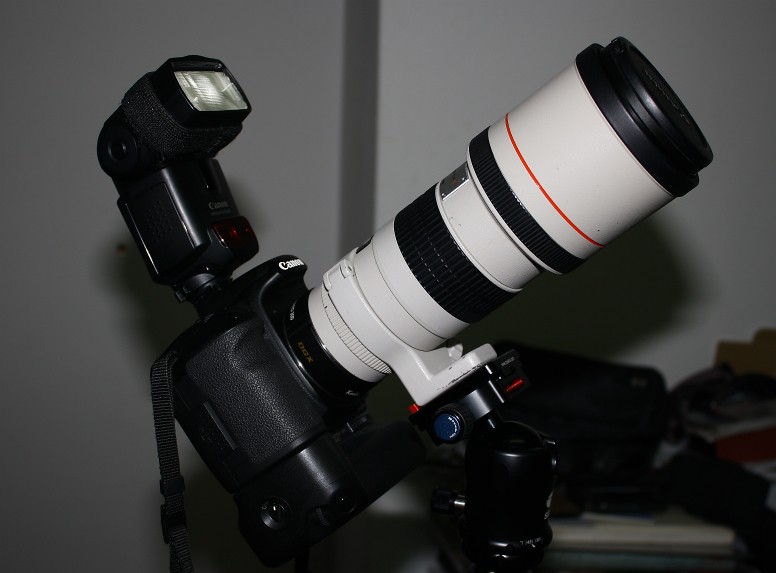
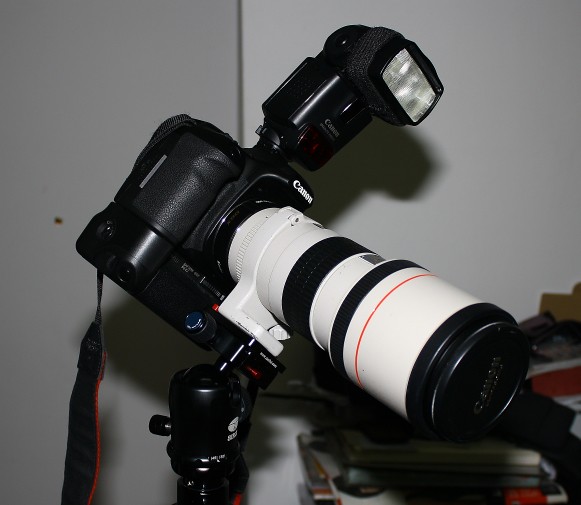
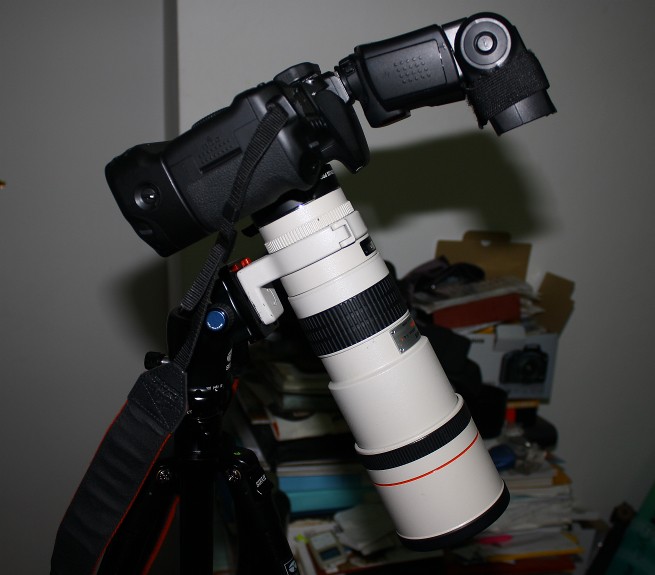
The ballhead is strong... I load it with mine heaviest set up (300mm f4L with 1.4x Kenko teleconverter, 40D + BG-E2 and 430EX II flash) - (1030g [camera with grip] + 330g [flash] + 1190g [300mm lens] + 181g [1.4x teleconverter] = 2731g)

The ballhead could hold on well in many different position so far.


Basically during all these tests... I did not notice any visible ballhead creep (or I think that is what it is call - the ballhead seemed very solid and not moving when not wanted to).

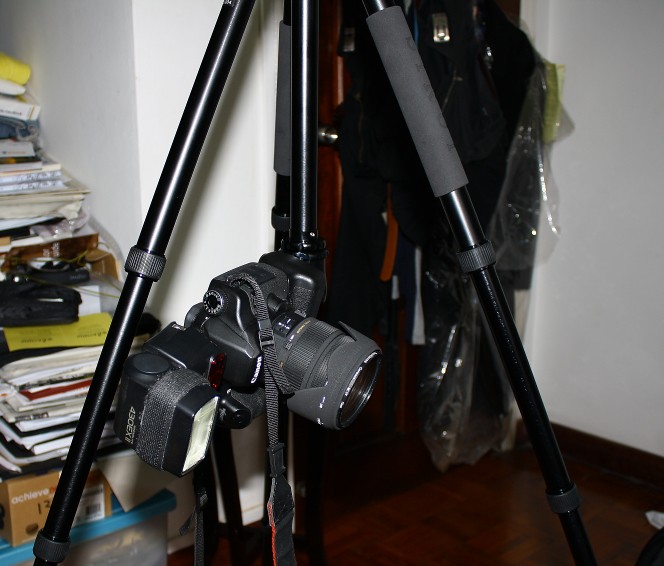
Another feature that I found very useful (I believe this feature is available to most tripods though), was that the camera can be mounted reverse. This would enable taking photo at a very low level.


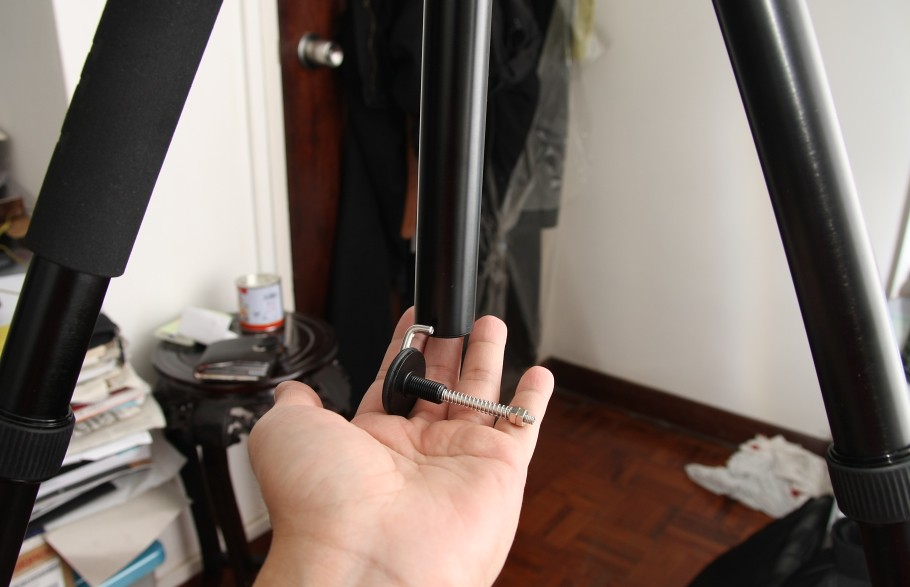
It is easy to do that, the first thing that we need to do was to remove the hook that was to be use for hooking of the bag.


The removal was easy, it was just a matter of unscrewing the hook from the stand.

After removal of the hook, the entire center piece can be removed from the tripod and inserted reverse. One common sense thing to take note of, was that when removing and inserting the center piece reverse to the tripod, ensured that the camera was not loaded on the tripod. Only after you have finish assembly, then load your camera on.

Other than this feature, the rest of the features are pretty standard... such as able to hook your bag on.


Overall I am pretty happy with the tripod and ballhead.

(Update: it had been almost a year since I got this tripod and written this review in my old blog, I have used this tripod extensively in many of my shoots. One thing I notice was that the tripod cannot go as low as I would have like, it don't have a vertical arm or provision for a lateral arm. There are ballhead creep... but is quite mild, I have learned to live with that).

Tuesday, November 29, 2011

Different Types of Lenses

Okay... sooner or later, I will have to touch on this topic, might as well be now.
 
There are basically a few category of the lens available in the market...
 
Classified by Focal Length,
 
UWA - Ultra-wide angle lens - this type of lens normally had a focal length of less than 21mm
WA - Wide angle lens - this type of lens would normally had a focal length ranging from 21mm to 35mm
General Purpose Lens - this type of lens would normally had a focal length ranging from 35mm to 70mm
Medium/short telephoto lens - this type of lens would normally had a focal length ranging from 70-135mm
telephoto lens - this type of lens would have a focal length of more than 135mm
 
Classified by types
 
Normally there are a couple of type of lens most used in the market.
  
1) Close-up/macro lens - this type of lens allow you to take close up shots of your subject, many people would use this type of lens to photograph insect, gems, coins, etc. An actual macro-lens would have a magnification of 1:1 and above, which mean the subject is capture at a 1:1 or more ratio on your sensor. There are special macro lenses like the Canon's MP60mm which actually had a ratio up to 5x of the object you are shooting.
  
2) Prime lens - this is a general name for lens with a fix focal length. Which mean you cannot zoom in or out using this type of lens and that the focal length don't change. This type of lens are normally simpler in construction, sharper than her zooming cousin and had lesser elements. The only thing is that it is not easy to use, and not flexible. But many professional photographers would swore by them.
  
3) zoom lens - this is the general name for lens with variable focal length... in simpler word, you can zoom in and out. It had lots of elements and is not as sharp as good prime lens. However they are very flexible and so was favour by hobbyists and professionals all over the world. If you get a good one (something like a 24-70mm f2.8, 17-55mm f2.8, 17-50mm f2.8, etc) lens, sharpness can even be comparable to some of the prime lenses.
 
4) Special Purpose lenses - there are a few of them, and normally you won't need to use them, they are specially build for special effects... the most popular type are fisheye lens (a lens that give you a wildly distorted view) and tilt-shift lens. Normally I would keep away from this type of lenses, they are expensive, you use them once in a blue moon and keep them in your dry cabinet most of the time.


So what are different category or type of lenses normally used for?
 
1) General Purpose
 
When I say general purpose, I mean usual walkabout lens, or a lens that most people normally leave attached to their camera. It is pretty inaccurate though for some... because at times, many photographers would develope their own styles and I have seen someone with a 300mm lens attached almost permanently to their camera.
 
Anyway, what I listed here is generally for normal usage though,
 
The most popular lens for walkabout was a 18-55mm kit lens. They are quite sharp, had image stabilization in it and very small and light. I love my kit lens alot when I was using it. For some people who wanted more range, they would have gone for a 18-135mm or even a 18-200mm lens. However with such a wide difference in the focal length, there are bound to be some trade off with the image quality.
 
The next most popular walkabout lens was the canon's EF 15-85mm lens and the (expensive) EF 17-55mm or Nikkor 17-55mm f2.8 lens. Well the 15-85mm is a wildly popular lens because it covered the entire useful range, giving you a UWA lens and a telephoto lens all in one. The only problem I had with it was the variable aperture. Well... I desire a fix aperture, so I can shoot at the same speed throughout my entire zoom range... but unlike real professionals... this are not a deal breaker for me.
 
Third party lenses such as the Tamron 17-50mm lens and the 18-270mm lens are also gaining popularity amount all supporting camera brand user, because they are normally (much) cheaper than the brand's own lenses and provide decent picture quality. I myself had a few of the third party lenses... and had lots of fun with them.

(Note: in my case, my general purpose lens is the 70-200mm f4L lens which was almost permanently attached to my camera.)
 
2) Wildlife, birding
 
Many lenses can be use here... even short one... but for wildlife and birding, my choice of lens is beyong 200mm. I want plenty of distance between myself and my subject... and for some of the more nervous subjects... you need much longer distance... hence the 500mm and above lenses (I don't have any of these though... it cause almost as much as a car in Australia).
 
So in this category, I would suggest having the 70-200mm f4L or better still f2.8L with a x1.4 teleconverter or a x2 teleconverter... a 300mm f4 or f2.8 lens and anything higher than 400mm would be the best.
 
3) Macro/ closeup
 
Well... you can use a 18-55mm lens here... reverse it and get a good macro lens. However I will not touch on all these yet... leave it for later.
 
Macro lens - 100mm f2.8, 150mm f3.5, 180mm f3.5 are a few of the lens that normally people use for macro shots... they provide you with long enough a working distance between yourself and the critters so that you will not scare them off. However you must be sure that the lens are dedicated macro lenses - well most would tell you that their lens is macro lens by denoting a MACRO behind or somewhere in the lens. However do note that some of the lenses such as Sigma's 17-70mm f2.8-4 OS MACRO lens... was not macro lens. It is more of a closeup lens whereby it allow you to focus pretty close to your subject. But the magnification is not 1:1.
 
4) Portrait
 
Well... for this type of photography, there are a few definitive lenses available (although in theory or practicality, you can use any lens for this type).
 
a) 85mm f1.4/ 85mm f1.2L
b) 105mm f2
c) 100mm
d) 24-70mm
e) 24-105mm
f) 50mm
g) 70-200mm f2.8
 
Okay what I have listed down are the most popular lenses for portrait shots... but for me to choose? I would go for the 24-70mm lenses.
 
Okay, these are the few type of photography that most people are interested in. And the lenses that are associated with them.

Essential Accessories

Okay... now you got your first DSLR, DSLT, mirrorless, GXR, PnS and even rangefinder or medium format... what next?
 
Most of these cameras came with a kit lens (except for the non-changeable lens cameras - they already have a lense)... and many would have asked if they should change lenses, upgrade lenses or whatever. My answer is... NO! why the hell do you need to change lenses when you are not even familiar with your camera... and heck... many are still on Auto Mode and they already wanted to change lenses? I mean, many, many people thought that having a new lens (an upgrade according to many of them) would give them much better picture then their crappy kit lenses. I would laugh right into their face... heck, I can use my 18-55mm lens and shoot more interesting picture then an idiot with a EF 24-70mm f2.8L lens.
 
If you didn't improve on your shooting techniques, know the limitation of the lens on hand and know what is your shooting style, genre and stuff like that, you will only be wasting money and going into a photography forum to complain that your camera is no good, the lens is not good enough even when you are using a freaking L lenses or professional grade camera and that you wanted to jump ship to another brand.
 
So if you are not going to upgrade your lens, what other alternative are you looking at... when you have extra cash? Well... there are a couple of items that you need...
 
1) Dry Cabinet : This is different from the cheapo dry box that was normally given free. Dry cabinet run on electricity and normally uses temperature to control humidity in an enclosed environment (within itself). For people with camera in a humid area (humidity more than 60 to 70%) this is an investment that you need to spent. Why? Well... the bane your camera equipment is fungus. And in humid and warm area, there are good possibility of fungus growth. Fungus would destroy your lens' coating, so even when they are killed and washed off... there are a good chance that the multi-coating on your lens element are gone. It will also kill off your sensor too... not literally, but your sensor is a single most important and expensive component in your camera, when fungus grew on your sensor, it is very difficult to remove... plus it will show on all your pics taken at f8 and above. So don't be a cheapskate - get yourself a S$150 (onward) dry cabinet.
 
2) External Flash : This is an important investment, but was a stage up. Photography is about lighting... and how you manipulate light. Flash is important in the sense that it provide artificial light to an area that are otherwise too dim for your sensor. You might be able to capture still or moving object without flash, but it would mean, shooting at wide open aperture, high ISO and stuff like that. Well... if you don't mind noisy picture, then fine, go ahead without external flash. Of course there are other methods too, but it is more direct to just buy a good external flash and use it fully. Well... flash photography is not easy by any means (I am still a noob here and is learning hard too). There are a couple of techniques there... but you need to know the basic of lighting first (I am not going too deep here though.).
 
3) Tripod : In the order of 1 to 10, this would be the second or first most important accessory that one should consider buying and using. Tripod came in all size and cost... don't be a cheapskate and get a good one... most decent tripods cost in the range of S$150 to S$200+... there are very expensive one which can go past S$1k. The few brand that you would consider is:
 
 a) Sirui
 b) Benro
 c) Manfrotto
 d) Hercules
 e) Fotopro
 f) Gitzo (the most expensive in the group)
 
Of course there are other brands out there that are pretty good too... just make sure that they are stable. Tripod came in a number of different material - Wood, Aluminium alloy, Magnesium Alloy, Carbon Fibre, stainless steel and Titanium. Well, the most common ones are aluminum alloy and carbon fibre. Aluminium alloy tripod are cheap but very heavy as compared to carbon fibre one. Both can be very stable, but carbon fibre tripod could dampen shocks more (which is very desirable). I have read that wooden tripod had the best dampening effect... but was also one of the heaviest around.
 
So which tripod to choose? Like all photography question on which to choose, the answer would still be - it depends (I know you all hated me for that). Anyway, you need to know the weigh of your heaviest setup, then multiply by a safety factor of 3, to know what is the maximum load your tripod should withstand.
 
Why do we need a safety factor? Well... you don't just shoot your photo perpenticular to your tripod legs, sometime and infact most of the time, your camera might be in a strange angle or position while mounted on your tripod, thus you need to take that into consideration. From personal experience, a safety factor of 3 is pretty safe.
 
By selecting a tripod is not enough, you need a tripod head to go with it...
 
4) Tripod Head : this accessory shared the same importance as the tripod itself. Well... there are a couple of different type of tripod heads in the market. The most common one (not including the cheapo freebies given out by your camera shops), are the ballhead tripodhead. It is by far the most flexible one around and can be used to do alot of thing, but it is not the only head around. We have the panning head too. Well the panhead is a good tripod head that you might want when you are shooting landscape or using a lot of panning shots of moving object (in straight line). Next came the Gimbal head - this is a favourite head for people with very heavy lens (500mm and above or weighing more than 1.7kg). Of course there are others like the pistol grip and stuff like that (which I don't use at all, so don't know). The selection of which type of tripodhead to use is the same as selection of the tripod itself... or selection of the camera itself. You must know what you want to make use of the head. If I want to go birding and I have a very heavy lens, I would go for a Gimbal head, if I want a general purpose and very flexible setup, I would select a ballhead, and if I want to shoot panning shots, I would go for a panhead.
 
5) Monopod : this is optional... and many people do not have one. Well... I have two... this is a good equipment for me to stabilise my camera. Monopod is like a one legged tripod, it is lighter than a normal tripod, it can be deployed faster, but it is never as stable as a real tripod. How to choose then... unlike tripod, which you want it to be able to extend to as tall as possible (without compromising the overall stability) a monopod only need to reach the height of around your face, and this is for good reason. For tripod, you can raise the center column to its maximum and still the camera would maintain rather stabilise posture. But for a monopod, it is impossible... remember it only had 1 leg.
 
6) Bean bags: This is the cheapest thing around... it cost almost nothing. You just need an old shirt or pants or socks that you cannot wear anymore... fill it up with sand, soil, rice or beans (I would not suggest the last two as they are food and you don't want to waste food), then tied the open end and you have it. You can rest your sandbags to the ground or wall or anywhere and they will provide you with a great and comfortable support for your camera and lens... and hands. Another use was for you to pile these sand bags at the legs of your tripod or light stand to give you a better stability.
 
7) Filters for your lens: There are a couple of different type of filters around - namely, CPL, ND, IR, UV, gradual ND, color filters, etc. Well, I am only going to touch on UV filter here. All other filters are very specialise, and if you don't know them, you don't need them. UV filter came from film camera era. Film are very sensitive to UV rays... thus if nothing protected them, the photo that you took will have a hazy look in them. However in modern day's digital sensor, the sensor is not as sensitive to UV ray as the film... in fact you don't get to see any or much of the haze (unless it is real haze) in your photo. So have the UV filter lost its use? Not necessary, well... it could help to protect your lens' front element from knocks or scratches... and if you are shooting near a sea or with salt water spraying all over the place, it is probably a good idea to have a cheap UV filter attached to protected your lens element (especially to protect the multi-coating on it).
 
8) Lens Hood: some lens don't come with this. Well... lens hood is important as it cut down stray bit of light falling on the front element and result in flare. And other than this, it help to protect the front element of the lens from bumps and knocks. But you have to becareful, because some of the lens hood, if not designed for your wide angle lens will cause vignetting issues.
 
9) Remote Shutter release: Another important addition to your arsenal and very very cheap too (third party shutter release might only cost you S$6 - 2 plates of chicken rice).
 
Well... you thought that when you mount your camera on a one thousand dollar tripod with a six hundred dollar ballhead, that can take up to twenty kilogram of maximum load and your overall set up is only five hundred grams, you can have a super sharp picture... then you go and shoot a long exposure (30sec) shot... after waiting for 1 minute plus, a look at your pic... damn! there are plenty of shakes... so the next thing is... you throw your tripod, ballhead and camera into the sea and curse them for eternalty.
 
Well... that is abit exaggerating though, but you will feel very frustrated, after spending your entire month of salary and still couldn't get a crisp picture.... well... let take a look on why?
 
For long exposure, when your shutter is open, any slight movement to your camera will be devastating to your image. However when you press down on the shutter button, there are some movement on the camera, you might not detect it, but there is... this can cost you your picture. So how? Get a remote shutter release. It was wired to your camera (physical wire, or connected through IR or wireless radio frequency). Anyway, when you press the button on your remote, it will not cause any slight movement on your camera.
 
Of course there are other methods that you need to practice (but I will not touch them here).
  
So there you have it... these are the nine items that you might want to have instead of buying a extremely expensive lens and in the end, took shitty pics and you end up throwing your camera and your expensive lens into the dustbin (but if really you choose to do it, please notify me where you throw your camera and lens, huh?)

Getting noisy photos?

Recently... this question popped out... noisy photograph. An aspiring photographer just bought a brand new Sony NEX-5N camera and happily started shooting in a family function.

The result was horrid... at least to himself... blurry and noisy pic. So he asked for help.

A look at his photos... yep... those are photos with lots of noise (grains that might look ugly)... and some of the picture had very blurry subjects. So I asked for exif of those pic.

Well... the ISO setting are wayyyy too high... most of them are shot at ISO3200 and one or two are shot at ISO6400. I was like, wtf? Then I look at his aperture setting and shutter speed... most of the aperture setting are at f8 to f11... and shutter speed are hovering around 1/6 to 1/10.

So you see the problem here?

There are a couple... so let us go into the fact first.

Environment
   
First... the lighting in the environment of the shoot is pretty bad... it was night, and outdoor... not properly lit and people are moving around. There are a couple of kids running or moving pretty quickly...

Thus with this type of environment... it is no wonder that the photographer had to set his ISO high, in order to give him adequate shutter speed. However the second problem came up... he set his aperture too small... this is an obvious case whereby he do not understand DOF in relation to the distance between himself and his subjects. With a small aperture, less light will enter the lens and hit the surface of his sensor at a given time. So he would need to open his shutter longer and so lengthen the shutter speed.

All these added together... to give a rather noisy photo and if subject is moving fast or even slowly, you would get blurry pic... and not to mention with a longer shutter speed, the photographer is inviting effects to his shots due to shivering or shaking of his own hands.

So how to we remedy?

1) Know your environment first.
    a) What is the lighting condition?
    b) Are we shooting indoor or outdoor?
    c) If we are shooting indoor, what is the environment like - low ceiling? What is the color of the ceiling?
    d) If shooting outdoor, what is the lighting condition? Well lit or in daytime?
    e) What subject are we shooting? running kids, animals, models posing, adults that don't mind to be still for a while?

Only by establishing the environment that the shots are to be taken, could we determine what equipment to use or take (this would include, external flash, tripod, monopod, lenses, softbox, bounce card, etc).

2) Know the relationship between ISO, shutter speed and aperture.
They are related... but first lets take them apart and look at them one by one.

a) ISO - this is a value whereby the sensitivity of your sensor was being measured, the higher the value the more sensitive your sensor would be to light. So the higher the ISO-value the more sensitive the sensor is to light. However, the catch is... the higher ISO-value, the more noise will appear in your photo. So in practice, I normally don't like to go past ISO-800... although in recent photoshoot... I have been shooting at ISO3200 or even ISO5000 (and make full use of the grains in the photo to my advantage - that will be cover in later discussion).

b) shutter speed - this is the speed whereby your shutter is opened and exposing your sensor to the light that enter from the lens. The longer the shutter is open, the longer your sensor is exposed to the light. However if there is any movement (be it yourself or your subject) during the time your shutter is opened, it will be recorded in the camera and so you will have blurry picture.

c) Aperture - this is directly related to DOF (Depth of Field). DOF is the distance between the nearest and farthest objects in your picture to remain focused. Herewith, there is a rule of thumb
    "The larger the aperture, the thinner the DOF and the smaller the aperture, the deeper the DOF"
So if you open your aperture wider (small F-value) the lesser area of your subject will be in focus, all other will be blurry and the smaller your aperture (big f-value) more of your subject and the background will be in focus.

Okay, now we put these three variable together and see what we got.

If your close your aperture smaller - less light will be allowed into the lens, so less light will hit the surface of the sensor, and in order to get the photo properly exposed, you would need to open your shutter longer so that the sensor could be allowed to receive more exposure. However that would result in shakes and shivering in yourself or your object and so it will cause a blur shot (motion blur of yourself and/or your subject). So one would have to increase ISO value... this would make the sensor more sensitive and so it will need less time for exposure... however noise will step in and ruin your otherwise great photo.

So in this manner, we would like to use as low an ISO as possible, yet increase shutter speed... this mean your aperture had to be opened wider. However if you open your aperture too wide, you would have too thin an DOF thus you might only get certain part of your subject in focus.

So the first thing is... you must know the relationship between your distance to your subject and the aperture value. A good way to start was to open your aperture to around f4 or f5.6... it should give you enough distance between yourself and your subject whereby most of the subject or all of the subject will be in focus.
  
Next with an aperture of around f4 to f5.6... your speed will still not be enough to freeze the action of running kids or moving adults. So you need to rise your speed... note that we do not want to increase ISO value though, so the only way is to increase the lighting in the area.

How to do it? Flash... either a direct flash or external flash, with tilted head so that the light don't go directly on the subject. I like to use bounce flash.... but at time, you cannot because there is no where to bounce your flash... so you can use a bounce card or stuff like that.
  
Also note that for alot of camera, there is a limit in shutter speed if you are using flash (for Canon it would be 1/250)...
  
So up till now, we know how to remedy the problem in that aspiring photographer's shots. But in detail... like how to shoot flash and stuff like that, I would need more than a few pages (will discuss later).

What Lens do I use for Wedding Photography

Hmm... this question popped up quite a bit... although there are tons of information already available online... so I will not go too technical.

So what lens to use?

Short answer: Depends.

Long answer: Scout the venu of the wedding event. Know exactly where you will be when in the wedding, where would be the couple, where will they be entering, and where is the stage. How far and at which angle will you be from the stage or your subject.

Only by doing that would you know what lens you would need. Of course prime lens with large aperture would be a very good choice, but for me... I will not touch them during wedding ceremony... why? They are not very flexible and versatile. I would go for zoom lens.
  
Well... so what zoom lens to use? For wedding, and your subject is just the couple (for example), use the 24-70mm f2.8 lens. This lens is excellent... wide enough and with a good reach... plus it is a fast lens (f2.8)... However if you are positioned somewhere too far back, then you might want to consider a 24-105mm f4L (if you are using Canon) lens... or even a 70-200mm f2.8 lens.

For people who are on a budget, you might want to consider a 18-200mm lens (not exactly fast lens, but pretty alright, and with a flash, they are a good piece of equipment)... anyway, you don't need to have a super fast shutter speed, the couple will not be running around.

However, what I find strange was... people are fussing over what lens to use... then they use their build in teeny minee flash...

Well... my answer to that is... if you have the money to get those massively priced lens like the 70-200mm f2.8, 24-70mm f2.8, 24-105mm f4 lenses... might as well spent some more to get a decent external flash... bounce card, soft box and the thing like that. They are really helpful in events.

But one thing for sure is... please do not hinder real professional taking pictures of the couples... they are helping the couples recording down their memories... you do not want to spoil that.

Where to buy your cameras in Singapore

Well... I have been hit with this question lots and lots of time... if people are paying me 2 cents everytime they ask this question, I will be a very rich man.

Anyway, I would not go so far as to tell anyone not to buy from any shop or expo (people can sue my pants off)... and since no one is paying me 2 cents everytime this question is being brought up... I will not try my luck.

Anyway before going into where to buy the cameras and the accessories, there are a few terms that everyone needed to know.

1) Grey sets - this is legit sets from overseas... somehow they flow into Singapore (legally or illegally). These sets are normally not covered by warranty in Singapore. Note that for Canon, all camera body and lenses bought from overseas or from shops selling grey sets, will not be covered by warranty. As for Nikon, their camera body must be bought in Singapore and from shops selling local sets... lenses wise, they can be bought from overseas with international warranty.

2) Local Sets - well, these are sets that are sold in Singapore by shops that bring their products in from an authorise distributor or direct from the brand headquarter. The sets are covered by local warranty, which mean you can sent these sets down to their respective service centers for servicing (free if you are within warranty period - condition applied).

3) Shop Warranty - I have been seeing quite a number of shops offering this option when you buy products from them. Don't be mistaken... this are shops that offer you servicing for the products inhouse and not by the service centres... it is a different matter.

Okay... now which shops to get your cameras from? Well... for megastores and electronic shows, they sold the products by the suggested retail price. All brands had a suggested retail price for shops selling their product, and this price is normally higher than street price.

But I never say don't go down to the megastores... megastores and electronic shows normally offer very very good deals on cameras that are end-of-line already... recently I have seen an Olympus E-PL1 camera going at the crazy price of S$4XX in an electronic show!

Also at times, you might be seeing products that you can not find in other shops, being sold in megastores. The reason is simple, small shops normally don't bring in rare items or they keep their inventory very small to minimise loses or to ensure that they do not need to keep stock for too long. So many of the products cannot be found in small shops might be found in megastores (who had a bigger margin).

Well... there are a couple of shops in Funan (TK foto, SLR-revo, John3:16), Penisula Singapore (Cathay Photo), Sim Lim Square (notably a sixth floor shop - Orient Photo), Ang Mo Kio (MScolor) that sold cameras and their accessories at a reasonable price.

However before going down to grab your camera and stuff... be sure to email them, call them and whatever to get quotation first. That would save you lots and lots of trouble. The above few shops that I have mentioned, all sold local sets, so warranty are covered.
There are some shops that do not sell local sets (their product are all legit and entered singapore legally though)... these shops sold grey sets and many offered shop warranty.

When you buy something, be sure to ask if it was grey or local sets.

Interchangeable lens systems - of non-traditional system (mirrorless, DSLT and of course GXR)

Been meaning to write this down... after some busy stuff at work... okay... here goes.
   
Mirrorless interchangeable lens system : As the name suggested, this type of interchangeable lens system do not have a mirror in it. Mirrorless system is normally smaller as compared to traditional camera. This is because, it didn't have a mirror and a large prism. The entire group of this camera type utilize the contrast measurement (detection) autofocus system only.

There are a couple of brands nowadays making the mirrorless system unlike a couple of years ago whereby Olympus pioneered the first one, following closely was the Panasonic... now Sony, Nikon, Pentax and Samsung had joined the market... both Sony and Samsung's mirrorless system featured larger APS-C sensor, while Nikon and Pentax took on a different approach by introducing smaller sensor that is basically a bit bigger than normal point and shoot camera.

Olympus : E-P series, E-PL series and E-PM series
Panasonic: GF series, GH series and soon GX series
Sony : NEX series
Samsung: NX series
Pentax: Pentax Q series
Nikon: 1 series (not to confuse with Canon's 1 series flagships)

The mirrorless camera is an alternative to traditional camera and image quality are getting better and better... especially for Sony and Samsung's who utilize the same type of sensor for cropped DSLR. I have not really tested the Samsung camera, but from what I understand... I don't like Samsung cameras - it is just personal opinion and by no mean a deterrence to people going to purchase one.
  
The main problem with the mirrorless was that I find that many of them had really aweful electronic viewfinder and some even lacked a dedicated viewfinder build in but sold as an accessory. This can be a problem though... when you fit the optional viewfinder, you cannot attach any other accessory to the camera. In bright sunlight, many of the live view (the big LCD at the rear of the camera) became difficult to see and so we need to utilize the viewfinder. However with the viewfinder attached... we cannot use an external flash, which mean we cannot do fill flash for some of our subjects. Although many would argue that many of the camera have build in system to control external flash wirelessly... but I still find that a hassle.

As for my recommendation on which mirrorless system to get... well... the first thing you must look into was what you intended to use the camera for? what is your photography preference/ style?

If alot of your shots are to be done in dark areas or you are extremely particular about noises (image term) you would want to consider larger sensor mirrorless systems such as Sony's NEX system. But my personal preference would keep me away from Sony, because I don't like the feel of that camera.

If you want very very fast autofocus... then you should go for the Olympus E-P system and also Panasonic's GF and GH systems. They boast to have the fastest autofocus system around... not sure if they are really able to compare with DSLR, but they are sure to be the fastest in the mirrorless system.

If you want insanely high frame rate (for sports and action photographers), then the choice is pretty clear... Sony's NEX and Nikon's 1 series (Nikon's 1 series also had a 62 points autofocus system which is very good for tracking purposes)

All in all, the mirrorless system make a very good and small camera that can be carried around with minimal efford. By far, only the Olympus and Panasonic offered the most number of lenses and what is great was that both can use each other's lenses... which mean those juicy Leica lens that are build for Panasonic can be used on Olympus with no modification, adapter etc. and also those nice Zuiko lens that are being used by Olympus' DSLR can be used on the m4/3 mirrorless cameras via a simple adapter and the lenses can still have AF, metering, etc. And that increases the number of lenses needed.
  
And yes... many would argue that you would not need that many lenses in your life... but it is good to know that there is the lenses there in case you need to rent them or purchase them... it give you a choice.
  
DSLT : This is Sony's innovation and up till now... only Sony builds it. The DSLT camera are branded under Alpha series which for all Sony camera user would know that that was their DSLR system. The DSLT cameras are of the same mount as the rest of the DSLR mount and so they can utilize the same lenses from Minolta, Sony and Carl Zeiss lens build specifically for Sony.

A short history of Sony's venturing into DSLR sector. Sony bought down Minolta which was essentially a camera maker and had make some really good SLR in the past. This is the first venture they have into the DSLR market. Previous attempt are not really that amazing... until the introduction of the A580 onward... which is quite good but still abit lacking in my personal opinion.

Sony had also came with an agreement to the German's Carl Zeiss lens manufacturer to create lenses with Autofocus capability for Sony's lenses (Sony and Sony alone). So in the market even when you purchase a Carl Zeiss lens with your brand of camera's mount, you would not receive a lens that could autofocus, so you will essentially be paying thousands of dollars for a fully manual lens.

Okay, now lets come back to the DSLT technology. This technology utilize a semi transparent and 'fix' mirror, which effectively removed any forms of 'reflex'. So it cannot be called a DSLR (for the lack of the reflex in the term). Meaning, the mirror would not flip up or down when you press the shutter button, unlike the traditional DSLR, whereby the mirror will flip up and allow light to fall on the surface of the sensor. For the DSLT technology, the mirror is semi-transparent, so the light will penetrate this mirror and fall on the sensor surface. However some amount of this light (around 30%) of it will be reflected off the mirror and channel to the AF sensor for autofocusing.
  
With this, the DSLT could utilize the faster phase-detection autofocus system... and without provision for moving mirror and also the lack of the large prism needed to channel light to the viewfinder and metering system. The overall size of the DSLT is smaller than the DSLR... however when compared to the size of the mirrorless system, it is still larger, because there is a need for a mirror and so the sensor had to be pushed back more.
  
So... it seemed like this system is the best... it used the faster autofocus system and was smaller and lighter than the traditional DSLR (of same classes) and because there is lesser mechanical movement of the camera (mirror reflexing) it should be more durable and also cheaper to manufacture so it should be cheaper for consumer pocket. Finally without the provision of flexing mirror, the camera can achieve insanely fast frame rate.
  
However, everything came with a price. The semi-transparent mirror would disallow full light to be falling on the sensor, and so only 70% of the light fall on the sensor, thus we are seeing around 30% light lost... which can be very undesirable for people who are shooting in darker places.
  
For me... that is a no go... but that is only me.
  
GXR system: Okay... here is a strange little system. When we say interchangeable lens system, we are looking at changing of lenses only. Ricoh came out with a new solution... They recognised that not everyone wanted a APS-C size sensor in their interchangeable lens system and might want it in future. So they came out with a modulars system whereby they allow user to change the lens + sensor modules easily. Their base system was just a 'skeleton' system that do not have anything except for the LCD live view, shutter button, control dails, and other feature buttons.

Then they came out with a couple of modules that include a lens fixed to an enclosed body that also housed a sensor. The user can simply attach one modules at a time to the camera back module easily. And as Ricoh claims it... since their lens are fixed to their camera module, there are less chances for dust to gathered in the camera... making the camera easier to maintain.
  
Another good point is that there is no mirror in the module too. So it was essentially a mirrorless system and without the flexing of camera, the shutter speed can be electronically controlled to achieve very very high frame rate.
  
One problem though... each module would not be cheap and also there are only three modules available at present moment. So for people who wanted to shoot telephoto... forget it.

Autofocus Systems

There are basically 2 type of autofocus system that are being use in Interchangeable Lens camera systems (a third type is the hybrid system of both the 2 AF system and I am not going to touch on that just yet).

The two types of AF systems are known as Phase Detection Autofocus system and Contrast measurement AF system.
   
Phase Detection AF system: This AF system is mainly used in DSLR and DSLT. It is by far the faster AF systems among the two. This AF system works in the following way.

Light entered the camera through the lens and hit the mirror which was not really transparent, thus allowing some of the light to pass through and was reflected again by a secondary mirror behind the main mirror, while most of the light got reflected up to the massive prism in the DSLR/ DSLT and transfer to the metering system and also the viewfinder. The light that had passed through the light and reflected down by a secondary mirror would hit the AF sensor (do not confuse an AF sensor with the imaging sensor).
  
On top of the AF sensor is a set of precision optics (micro lenses) that splits the incoming light into 2 beams. Base on where this beams strike it, the sensor can determine how far out of focus the image is and whether the focus is infront or behind the focal plane. With these information, the AF sensor is able to calculate and produce a very accurate focus.

Contrast Detection (Contrast measuring) AF system: This AF system was normally being use in mirrorless interchangeable camera and small compact (point and shoot) cameras. This system make use of only 1 sensor (unlike phase detection AF system which differentiate both the imaging sensor and AF sensor) the contrast detection system combine both imaging and AF sensor into a single package.

The contrast detection AF system normally started off with the lens at infinity (focal length) and move back step by step to gauge at the contrast of the scene to see if it increases or decreases. If it increases, the system would know that it was getting toward an accurate focus point... and once the system get past that point and found that contrast decreases, the system would identify the peak of the contrast point and lock on to that point as focused point.
  
(note: from personal experience, sometime the system told me that it had achieved focus point, but everything are still blur... and this would easily occur especially with complicated scene... unlike my DSLR which utilized the phase detection AF system which is either was spot on... or simply cannot focus.)

Of Camera Sensors

Well... now we know the different type of interchangeable lens cameras in the market... I did mention quite abit on sensors and sensor size. So what exactly is the different.

First of, we will look into the main type of sensors available:

1) FF sensor
2) APS-C
3) APS-H
4) 4/3
5) m4/3
6) Foveon X3

And there we have it... of course we have bigger sensor size like the digital back medium format cameras... but they are essentially of the same construction as the normal FF, APS-H and APS-C sensor of the Bayer's type. Anyway, how does all this actually make any sense?

Well... the sensor actually took its form replacing 35mm film in olden days. FF sensor took the size of the 35mm film, and was... well you measure it... 35mm across diagonally. But it was very difficult to create and expensive to manufacture.

Plus not all hobbyists needed such a sensor size.

So came in the APS-C and APS-H sensor size. The APS-C is by far the most used in interchangeable camera systems, almost all the major brands uses them (Canon, Nikon, Pentax, Sony, Samsung and Ricoh). The most interesting thing about this sensor size was that they are not really that standard. Canon's APS-C sensor is a tad smaller as compared to the rest of the brands... but they did came up with a larger sensor and called it the APS-H sensor which they introduced in their 1D flagship (to be discontinued soon with the introduction of the 1DX FF camera).

Anyway, since the APS-C and APS-H sensor are essentially smaller than the FF sensor, there came in the crop factor, which will be needed in calculation with the focal length of the lens. Not to be mistaken though, the focal length of the lens remain the same no matter what sensor you use, but the end result needed some multiplication of the crop factor.
Confused? Well... I am too in the beginning... but to make things easy, I will try to explain in as layman a term as possible:

As we know, today's FF sensor is made to the same size as the olden day's 35mm film. When that is translated into picture taking. The surface of the sensor that are subjected to light from the lens are larger and so more of the picture or scene are being captured on the sensor to be loaded into digital file (RAW or JPEG).

However if you use a smaller sensor, lesser of that scene or picture will be captured because the surface area available for light to fall on is smaller.

Therefore when you enlarge the picture captured by the smaller sensor to the same size as the picture captured by the FF sensor, you will have a larger picture which seemed closer. Therefore there is a saying that if you fit a lens to a camera with a smaller sensor the lens will have a larger lens size.

By how much was the size of the lens to be multiply will depend on the size of the sensor in the camera. Below is a list of sensor crop factor that you would need to multiply to the lens size for different brand of cameras,

1) APS-H - x1.3 (Canon only)
2) APS-C - x1.5 (Nikon, Pentax, Sony, Samsung, Ricoh), x1.6 (Canon)
3) 4/3 - x2 (Olympus)
4) m4/3 - x2 (Olympus and Panasonic)
5) Foveon - x1.5 (Sigma)

Okay, now we get the crop factor out of the way, we will look at 2 sensor type that are mostly used in today's sensor technology- CCD and CMOS. At present moment most of the interchangeable lens camera are using CMOS sensor. So what is the different?

CCD (charge coupled device) and CMOS (complementary metal oxide semiconductor) sensors are sensors created to achieve the same end result... although both functioned differently.

Both the CCD and CMOS convert light into electrical charge and process it into electronic signal. The different is, for CCD sensor, every pixel charge is transferred through very limited number (often only one) of output nodes, to be converted into voltage, buffered and sent off-chip as analogue signal, whereas for CMOS sensor each pixel had its own charge to voltage conversion capability.

Because all pixel of the CCD sensor are devoted to light capture and there is only one output node that transfer the pixel charge and converted into voltage, image uniformity is excellent. As for CMOS sensor, less uniformity is present.
The main issue here though was that CCD sensor required more power and so is battery draining and I would imagine from the operation, they are generally slower. CMOS sensor on the other hand is cheaper to manufacture and is faster in speed.

So why most small digital camera are using CCD since it is suppose to produce better image quality while the more expensive Interchangeable Lens Cameras are mainly using CMOS sensor. Well... from what little I know, CMOS sensor uses less power and so are not that hard on battery and also was cheaper to manufacture. While small PnS camera had very small sensors and so it is cheaper to manufacture - even when using CCD... while CMOS couldn't produce as good an image as the CCD, so implementing the CMOS sensor into the small camera will worsen the image quality too much.
However when implementing the CMOS to the Interchangeable Lens camera, first, it was cheaper to manufacture and as we all know the sensor in these cameras are much larger than the sensor in the PnS, and so it cost will not skyrocket to unfeasible rate. Second CCD is slower than CMOS and that is really not a good trait in Interchangeable Lens camera system because speed is very very important. Third, since the sensor is bigger, the surface area where light falls on are much bigger than the PnS's mini sensor, and so the noise control and image quality are much better.

Thus we are seeing CMOS sensor in most Interchangeable Lens camera, however we are seeing one particular isolated case in the Leica M9 rangefinder, whereby they are interested in getting the best quality image for their camera, so we are seeing the M9 using a APS-C size CCD sensor (and well... they are selling the units for more than S$10k for the body only).

Now... there is also two special type of sensors that we are seeing in Olympus and Sigma. The Olympus sensor are essentially a common CMOS of bayer's type except that it's size are different - the 4/3 sensor.

The 4/3 sensor are a joint development by Olympus and Kodak. This sensor is smaller in size as compared to the rest of the big sensor. This small sensor had a very important advantage over their big cousin. The camera can be smaller and also the lens could be small yet fast and very wide aperture... while equal focal and aperture lens of the bigger brothers will be massive in size and very expensive.

Of the advantage:

1) This sensor enable brighter corners (less vignetting)
2) improved off center resolution even with wide angle lens (something most desirable)
3) Deeper Depth of Field, which means more of the pics stay sharp (not exactly a desirable trait, depending on what you really want).

With all good things... came the disadvantages too:

1) Small sensor means less light hitting the surface... more noise. So high ISO noise control is not as good as big sensor camera.
2) because of crop factor... it became really difficult to achieve wide angle shots... unless your lens is ridiculously wide.

Not to confuse the 4/3 sensor with the micro4/3 sensor although both shared the same size. The micro4/3 sensor was a joint development by Olympus and Panasonic. It was essentially almost the same as the 4/3 sensor... in this literature, I will not go too deeply into this sensor and treated it the same as the 4/3 sensor in size and crop factor... as well as most of its advantages and disadvantages.

The second and most interesting sensor here is the Foveon X3 sensor that so far only Sigma uses.
When we came to this sensor... we must first know that there are essentially two different type of sensor... one was bayer sensor and the second was the Foveon X3 sensor.

Simply has it, the Foveon X3 sensor would capture all three color (Red, Blue and Green) in each pixel, unlike the Bayer sensor. For the bayer sensor, 1/4 of the pixels (in the sensor) would capture Blue color, 1/4 of the pixels would capture Red and the rest 1/2 of the pixels would capture Green color.

In this way, picture captured by the Foveon X3 sensor could be interpolate to 3 times its normal resolution (say 10MP would give you 30MP) and still produce reasonably sharp photos. It would not be the case for Bayer type CMOS sensor though.

Another thing about the Foveon X3 sensor was the lack of AA filters (which must be present for Bayer type sensor or we will be seeing massive moire pattern on the photo.) however the inclusion of the AA filter would also decrease the sharpness of the image... thus with the Foveon X3 sensor... we are seeing a very sharp and crisp image.

However, one problem with the Foveon X3 sensor was the cost to manufacture the sensor... and so the new Sigma SD1 DSLR costed around US$8000 and with almost no other function but to take still photos.

Okay... now we have a tiny knowledge on the different sensor type that are being use in Interchangeable Lens system.