Saturday, September 14, 2013

Fujian TV lens GDS-35 35mm f1.7

I am looking for a 35mm lens for my OM-D EM5, when I came across this Made in China lens... it is selling very cheaply at around S$20+ with free postage in the ebay. I read some reviews (there aren't many, trust me) and these reviews are pretty alright. So I thought, "What the heck! It is S$20. I might as well try it. If I don't like it... I can still sell it off for slightly lesser money." So I buy the lens.

It took ages to reach me... I almost forgotten that I have bought it... and finally it came...

I will not comment on the packaging... one word... "cheap." In fact cheap is already a good word for it. I would have curse and swear... even the cheapo Russian 50mm lens came in a decent box. This one is just in an envelope with bubble bags.

I took out the lens... yeah... it was construct of metal (aluminium I suspect), pretty cheap and rough feels to it. I mean, I could have done better with a CNC machine than these guys. Really... rough edges, untrimmed edges... whats more?

There is a few cheap looking silkscreen or tempo print on the lens itself (not the optic element, of course!) that stated Fujian China TV lens GDS-35 f=35mm 1:1.7. And the lens cap that came with it is... yes... you say it... cheap... I would not say it is a lens cap... more like a cheap cover.


Anyway, I leave the lens there for a while not touching it because I am going overseas for business. And it was so small that I almost forget about it completely. Then one fine day, I remember I have this little lens and decided to play with it.

Well... turning on the zoom and aperture rings are smooth enough... actually it is smoother than many manual lens and easy to turn, I was surprise.

Hmm... looked like an easy to use lens after all.

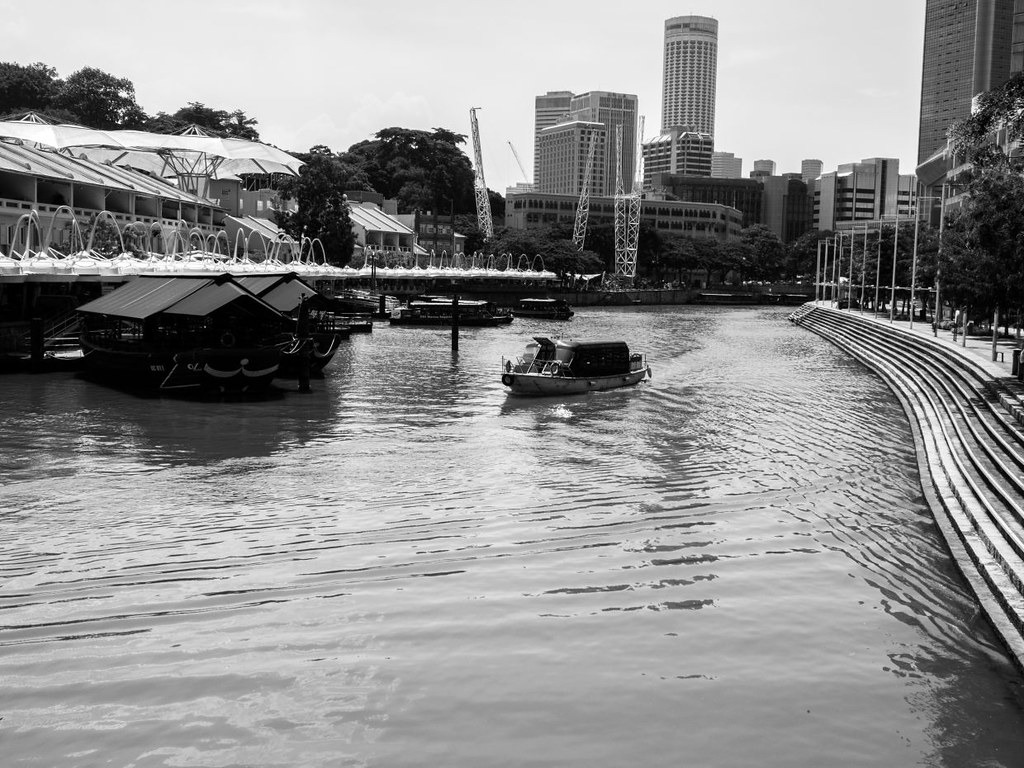
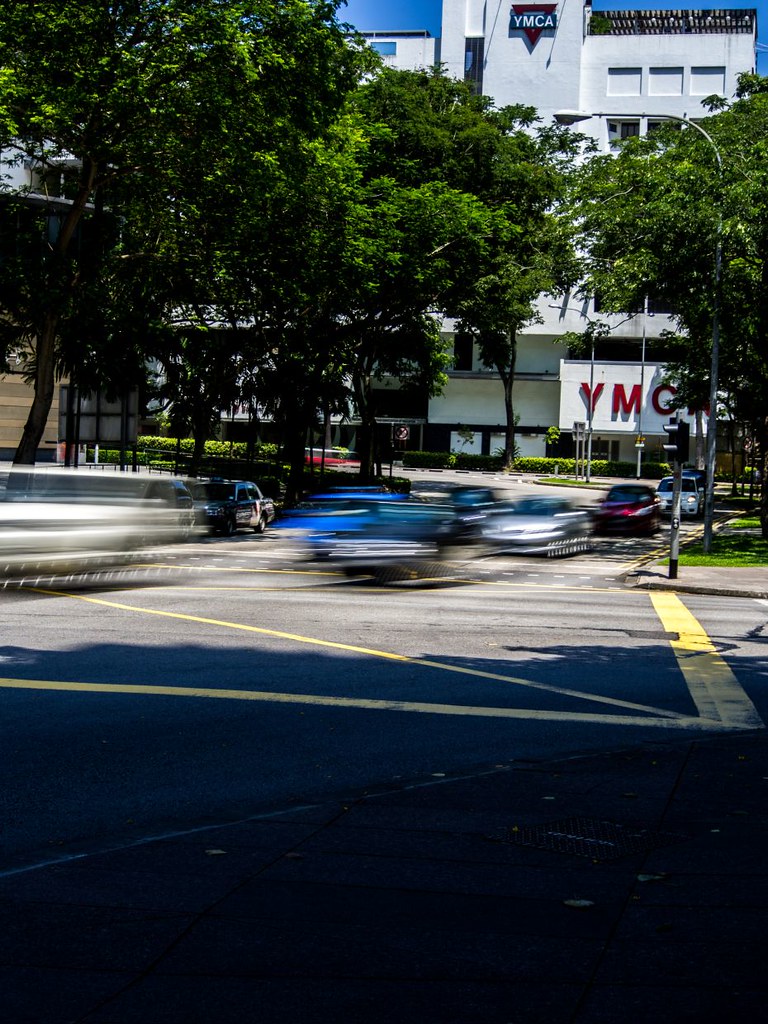
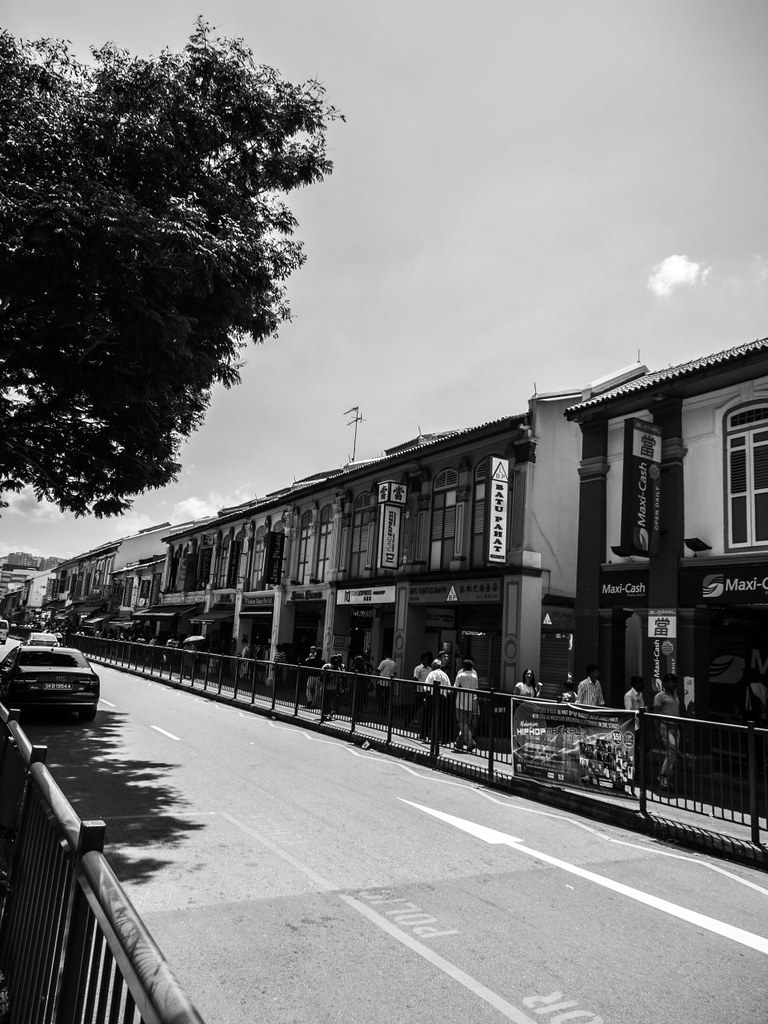
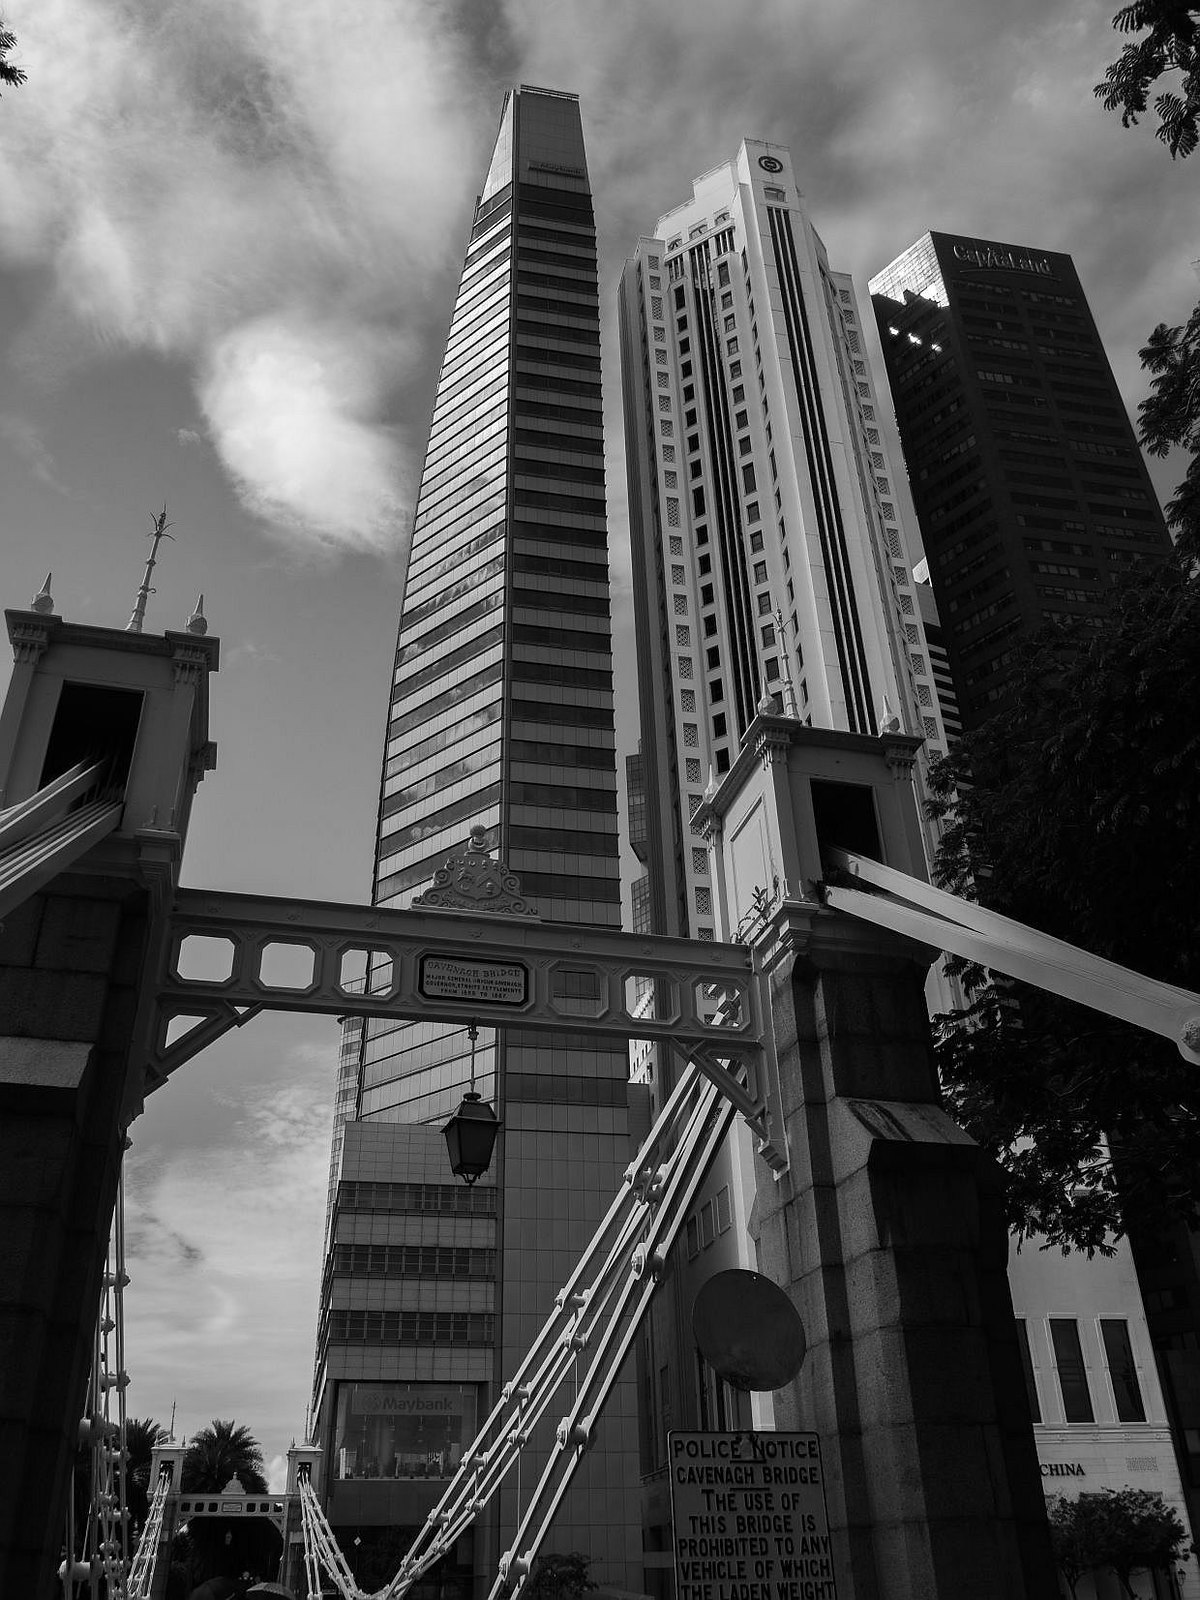
So I wasted no time but try it on some static objects in the comfort of my room... the result almost blow me away with such a small and inexpensive lens.


Wow... so I decided to try my luck on my baby dog.


I must say... I am really really please with the lens. The sharpness and ease of use is amazing. Even more modern lenses might not been able to achieve such a clarity of this lens. So who says the Chinese cannot make good lens.

All they need is some packaging and for goodness sake... do a better job with the printing and construction of the body! Make the lens looked more premium!


In conclusion... yeah... this is a good lens. One of the better ones I have seen for quite some time... and actually better than many manual lenses that I have bought in the past and sold them off almost immediately... this lens is good.

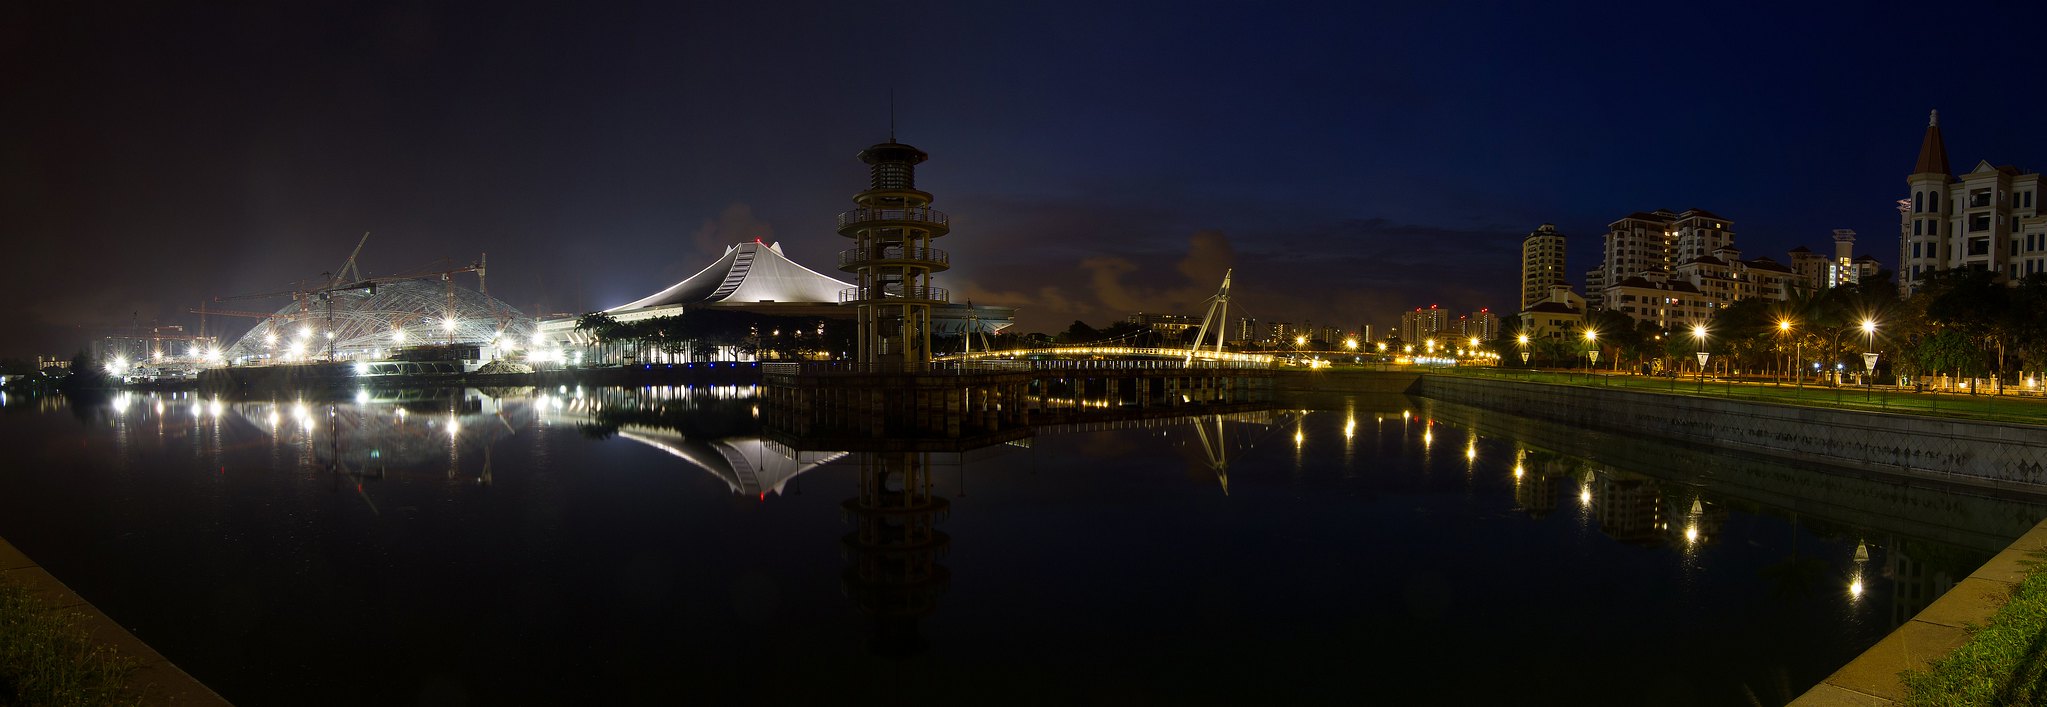
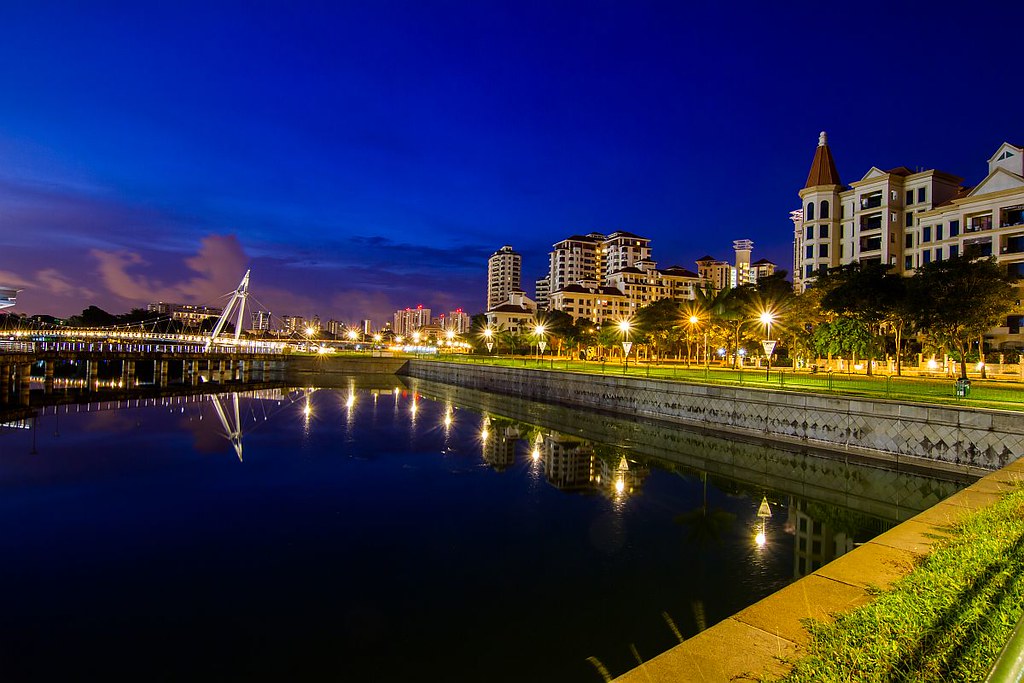
Ok... Tested abit for colour fringing and vignetting... and guess what... NONE!


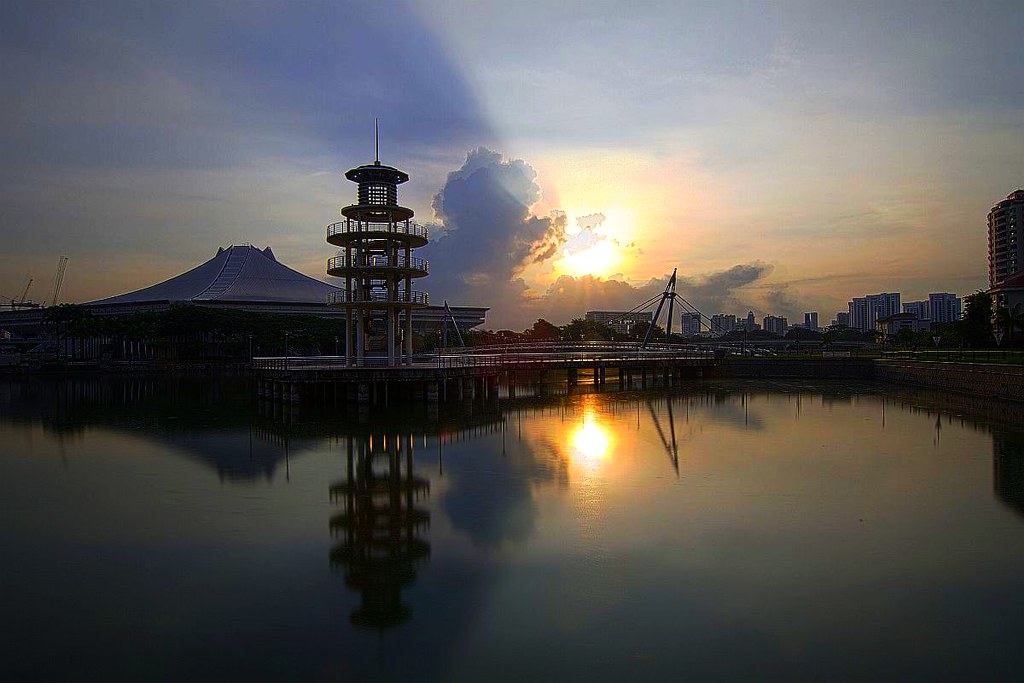
And don't you just loved the sharpness and clarity?

Guess like this lens is a winner. Highly recommended.

Friday, June 21, 2013

Third Party Olympus OMD EM5 grip

One of the biggest issue I have with my OMD was the tiny (basically non-existing grip). Although the camera is pretty light... even with the heaviest of m4/3 lens being attached, it is still painful after awhile (for me).

Anyway, the HLD-6 battery grip that was sold separately from OM-D might solve some of the problems... but the biggest thing was... that piece of equipment is going off at an amazing price... meaning - I cannot afford. Secondly, I don't want my OM-D to be too much bigger, but with the HLD-6, it grew to almost the same size as a DSLR. If I don't attach that battery grip... and only the mid-section grip, I cannot change battery without disassemble the grip.

I always wonder at that rationale... what in the world is Olympus engineer thinking?

Anyway, I looked into ebay for a third party grip. Saw one almost immediately that served my purpose. So I got it immediately and at a good price too.

Anyway, the grip was from a China company known as iShoot. It was made of aluminium and weighed at around 120g.

Receive the grip after more than 1 month of wait, and took it out... it was very well made, with tight tolerance and excellent workmanship... well worth the money spent on it.

Anyway, I screw it onto my OM-D immediately and admired my new grip. Then it occurred to me some very disturbing issue. The grip actually covered the SD card slot of my OM-D, so as and when when I needed to change SD card, I have to unscrew the whole damn grip and remove it.

Then came the next problem, if I mount my tripodhead quick release plate to my grip, it will covered the screw that was used to tighten the grip to my camera.

Double damn.

So the only thing left to do... was to saw off part of the grip. And that is exactly what I did.

For the sake of keeping things simple, the following is what I have now.


As can be seen in the photo, my battery cover is not being block at all... so there is not need for removing of the entire grip to change battery.

Original Grip,


After modification,


As can be seen from the above photo, it is clear where I have done the modification on.

I also added EVA felt to my grip so as to give it a softer feel. It worked like a charm.

I brought the OMD to my vacation in Japan (will update on the Japan vacation) and loved the feel of it... it was simply amazing! For people who hated the tiny grip of OM-D, can try this item. Not too expensive too.


Thursday, May 23, 2013

Weigh Lost Program 2

My weigh lost program regime was in full swing.... this time I wanted to try going to walk all the way from Clarke Quay up Fort Canning Hill get out from another end of Fort Canning Hill, then go on to Parkway mall, and from there to Dhoby Ghaut MRT station, then down to Little India, Farrer Park, Boon Keng, Potong Pasir and finally Woodleigh. In actual fact, I would have wanted to walk back home in Kovan. But gave out after reaching Woodleigh.

The load I carried with me was:

1) Backpacker BBK-4 canvas camera bag (see my review)
2) Olympus OM-D
3) 12-50mm lens
4) 40-150mm lens
5) Gitzo 1-series Basalt traveller tripod
6) Sirui C-10 tripod head
7) NDX400 ND filter
8) Olympus FL600R speedlite
9) 1 bag of batteries
10) 1.8litres of mineral water (3 bottles of 600ml water)
11) extra memory cards
12) sunglasses
13) lucky red cap
14) various adapters
15) 2 little torch light
16) remote control for my OMD
17) etc.

All of these added to around 10kg of equipment and weigh.

Anyway, I reach Clarke Quay MRT at 1145hrs on the Sunday and started my walk. It was blazingly hot that day, my little red cap doesn't seemed to be able to keep out the sun from my face, but I journey on... I believe in this verse... no pain no gain.

 1/320sec, f10, ISO: 200


 1/25sec, f13, ISO:200

 1/100sec, f6, ISO:400

For the next 3 photos, I used my trusty old ND filter to cut down on the speed of my camera in a bright hot day. It is import to do that so that I could give a blur to the vehicle moving while keeping the background straight and steady... the build in IS of my OMD helped too.

 1/6sec, f22, ISO:200

 0.5sec, f5.4, ISO:200

 0.3sec, f5.2, ISO:200

Well... nearing and in Little India, I am pretty amazed by the number of older buildings.

 1/1600sec, f4, ISO:200

 1/640sec, f4, ISO:200

 1/2000sec, f4, ISO:200

 1/1600sec, f4, ISO:200

 1/400sec, f9, ISO: 200

Well... Little India is not the only place with loads of old buildings...

The photo of a Hindu temple underneath is pretty old... and it was not in Little India... in my opinion, Hindu Temples are a piece of art. And I thoroughly loved that type of architecture.

 1/4 sec, f5, ISO: 200.

Well, I used my ND filter here because I am shooting up the sky... and it gave me the reassurance that the sun would not fried my sensor.

 1/4sec, f5, ISO:200

 0.4sec, f5, ISO:200

After that, I took a number of photos along the way, but those are lacking substances, so I decided to to showcase them here... anyway, there are still a couple of photos that I am pretty pleased with... like the following,

 1/400sec, f10, ISO:200

The above is an old fire station, I am not sure if it was still in operation, but it sure is a pretty sight.

And there... it concluded my walk. Actually it was pretty fun, but I felt weird towards the end of the journey and decided against walking further... or I might just lose it and there will be no more walks for me.


Sunday, May 12, 2013

Weigh lost programme

Well... I have always suspected it. Carrying lots of weight, walk for long distance under blazing sun and skip lunch is a good way to lose weigh.

And I put that to lots of try... everytime the result seemed promising. The last time, I carried 10kg plus of camera equipment to Pasir Ris park... and when I came home, I found that I have lost around 1kg of fats.

Today, I try that again... I carried around 6 to 7kg of camera equipment and went to Merlion Park, then walk all the way to Fort Canning Hill... and from there, back again. Drank 1.5litre of water, and still lose 1kg plus of fats. Hmmm... great!

 3.2sec, f/22, ISO200

 1/4 sec, f6.3, ISO200

 2sec, f22, ISO200

 1/800sec, f6.3, ISO200

 1/800sec, f6.3, ISO200

 1/60sec, f8, ISO400

 1/640sec, f10, ISO200

 1/640sec, f11, ISO200

 1/640sec, f11, ISO200

 1/1000sec, f11, ISO200

 1/500sec, f10, ISO200

So sometime it is good to have a hobby... like photography is my hobby... and if I really put my mind to it... it can also become a fun exercise routine that can let me cut down on the unwanted fats... and finally let me achieve my goal of attaining (finally) 85kg weight by this year end :)


Monday, May 6, 2013

Backpacker BBK-4 Canvas Camera Bag review

Finally I have gotten down to write this unprofessional review on a unknown brand camera bag... got it from ebay cheaply and fell in love with it after some time.

A brief History

I have gotten a National Geographic Camera Bag for my bro when he went overseas to further his education. I like the look and feel of the Nat Geo bag, but I hated the price... so I never get to buy one for myself.

Anyway, I was determine to find a decent canvas sling bag for my camera and went to ebay to have a look. Spend a couple of days to search for one... then came across the Chinese brand Backpacker BBK series of canvas bag. Well... I search the net... not much was written there (at least not much can be found in English), the pricing was reasonable though (much cheaper than Nat Geo). Then I found a site whereby I can bid for the bag. So I threw in the maximum I am willing to pay (I am not going to state the price here though) and wait... voila! I won the bag.

Then the waiting game...

It came around 1 month after I pay... well... that was expected, I seldom got what I have paid in less than 3 weeks anyway...

The Actual Review

When I gotten the bag, the first thing I do was to inspect the bag... its workmanship seemed pretty good. It had a tough feel to it. The bag had a removable compartment for my camera stuff... and another compartment for a 14 inch notebook.


The photos on top show the removable camera compartment and laptop compartment. In interior of the bag is waterproof (and so was claimed by the seller - I wouldn't risk it though).

I try the bag with my notebook + adapter. No problem at all... so yeah... it works.

Then came a day when I wanted to try it with my camera stuff...


Ta da! That is what I cramped into/ or on top/ behind of the bag... what was not shown was a 600ml bottle of mineral water, ND filter, wired remote control and my lucky red cap.

Anyway, the rest of the items were;

1) Canon EOS 7D + Optech Neck strap
2) 1x Tokina 12-24mm f4 lens (mounted)
3) 1x Canon EF 70-200mm f4L lens
4) 1x Sigma 17-70mm f2.8-4 lens
5) 1x IDEAL sunglass
6) 1x umbrella
7) 1x key pouch
8) 3x CF cards
9) 2x LED torch
10) a bag of batteries
11) 1x Canon battery (extra)
12) 1x External Battery + cable
13) 1x Yongnuo YN565EX flashgun

What I didn't bring is my monopod but it was shown in the photo to establish that it can be carried if needed.


Of course the black velcro straps and carabiner hooks do not came with the bag, instead I got them from local store cheaply.

Anyway, I wouldn't carry my monopod with that bag and so much equipment, it will be too heavy for my shoulder... and talking about weigh... I forgot to mention. The strap had a very very thick padding that is suppose to be comfortable for your shoulder... and I would say... it actually works!


All in all... I love my Backpacker BBK-4... and I am pretty confident that it will last me for years. So... who says good things are expensive?

Edit:

Recently I have been using the bag for photography trips around the island. And I always carried a Gitzo traveller tripod strap to the top of the bag. The bag could handle the weigh well... and I loved it alot.

Saturday, May 4, 2013

Sunrise at Tanjung Rhu Singapore

Well... it had been some time now since I last took sunrise photos and had been hoping to do it... but no one was there to 'accompany' me for the shoot... so the lazy bones in me won the battle and taking sunrise shots remained as a dream. That is until one of the photography clubs that I was in organised a shoot in Tanjung Rhu on 04-May-2013. I was thrilled, I wanted to shoot sunrise shots... and there is a group of people who wanted to do it too.

So I signed up for the shoot.

Then it occurred to me that I needed to get there by six in the morning... I checked the internet... found that the first train from Serangoon would be at 0544hrs... and that is, if everything went on time... in recent days, there had been plenty of train delays and stuff like that. So seriously I am not having much confidence in the train systems. So I bite the bullet and make an advance booking for a cab to pick me up at 0500hrs on the day of the shoot.

The night before, I packed my Canon EOS 7D, a Tokina 12-24mm f4, a Canon EF 70-200mm f4L and a Sigma 17-70mm f2.8-4 OS lens to my large shoulder bag (a China brand bag - Backpacker BBK-4 which I will do a review soon). I also packed a Yongnuo 565EX flashgun, a NX400 ND filter, some batteries (both for the Yongnuo and my Canon 7D), a 600ml bottle of mineral water, an umbrella, 3 Uncle Toby's energy bars to my bag. Then I pack my trusty old Gitzo to the tripod bag that my bro gave me... and was all set to go.

To cut long story short, I reach my destination safe and sound and had plenty of time spare to wander around. But I shall not bore any of you of the detail of my wandering. Anyway, my group of photography friends arrived on time and we are off to shoot.

 ISO 100, f9, 25sec

The abovementioned shot was a panorama photo comprise of 5 shots (stitched together with the Photoshop CS6).

The sun that day would rise at around 0645hrs to 0648hrs, so we have plenty of time to set up our tripod in a location that we found best suited to our taste. And I choose the area because it had the best view of the indoor stadium with the tower, bridge and some of the buildings in plain view.

ISO 100, f9, 30sec


 ISO 100, f9, 25sec

We waited patiently for the sun to rise... but something tell us that it is not gonna happen that day... the cloud... too many and concentrated are the cloud at the area where the sun should rise.

After 0700hrs... we know it was a failed attempt. Many people are starting to pack up. When suddenly we saw the shy orb peeking out from behind some clouds.

And so we went clicking.

 ISO 100, f16, 1/125sec

 ISO 100, f16, 5sec (added ND filter)

 ISO 100, f16, variable time (HDR compose of 6 photos of different exposure)

So it was not a total lost effort after all. We have a fabulous time and I took quite a number of shots that I liked. Anyway, I also had lots of fun with Photoshopping... especially trying out HDR and Panorama.

Looking forward for more sunrise shots in the future.